Github Actions是GitHub官方CI工具,与GitHub无缝集成。之前博客使用TravisCI实现的自动部署,现在转用GitHub Actions部署,本文记录部署流程。
如果你对次不怎么熟悉,可以参考阮一峰大神写的一篇入门文章,里面对基本的使用进行了介绍,GitHub Actions 入门教程
下面简单介绍下,github actions中用的一些术语
- workflow (工作流程):持续集成一次运行的过程,就是一个 workflow。
- job (任务):一个 workflow 由一个或多个 jobs 构成,含义是一次持续集成的运行,可以完成多个任务。
- step(步骤):每个 job 由多个 step 构成,一步步完成。
- action (动作):每个 step 可以依次执行一个或多个命令(action)。
接下来是操作步骤
生成公秘钥
如果本地已经有ssh公秘钥,则可以省略这一步,没有的话,首先通过以下命令生成公秘钥,
1
2
| cd {your git workdir}
ssh-keygen -t rsa -b 4096 -C "$(git config user.email)" -f github-deploy-key -N ""
|
github网站配置公钥
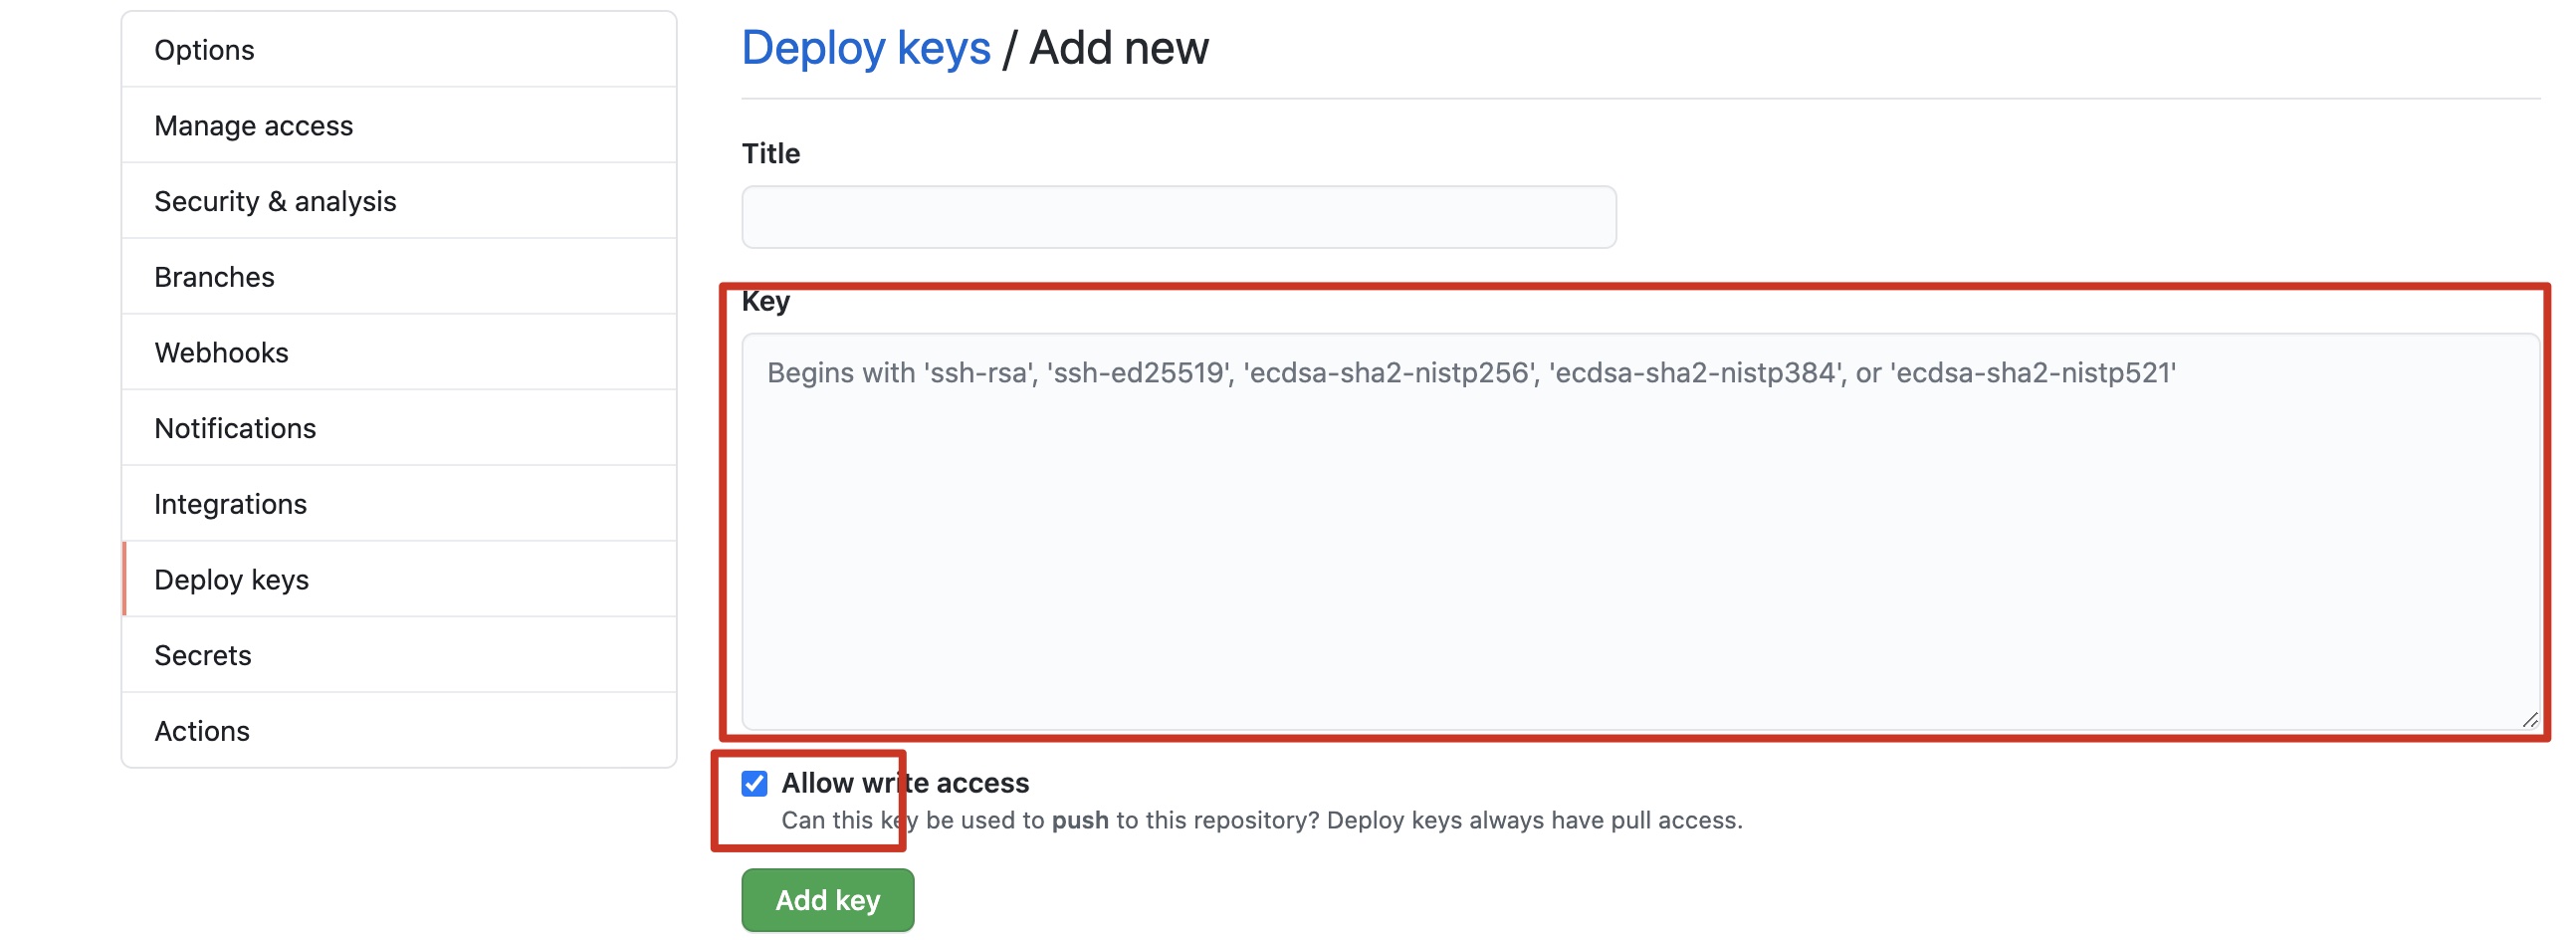
在 GitHub中博客工程中按照 Settings->Deploye keys->Add deploy key 找到对应的页面,然后进行公钥添加。该页面中 Title 自定义即可,Key中添加github-deploy-key.pub 文件中的内容,或者是你自己本地ssh秘钥中的id_rsa.pub公钥文件中的内容。
同时要注意的一点是,记得勾选,Allow Write access选项,否则会出现上传git失败问题。
github网站配置私钥
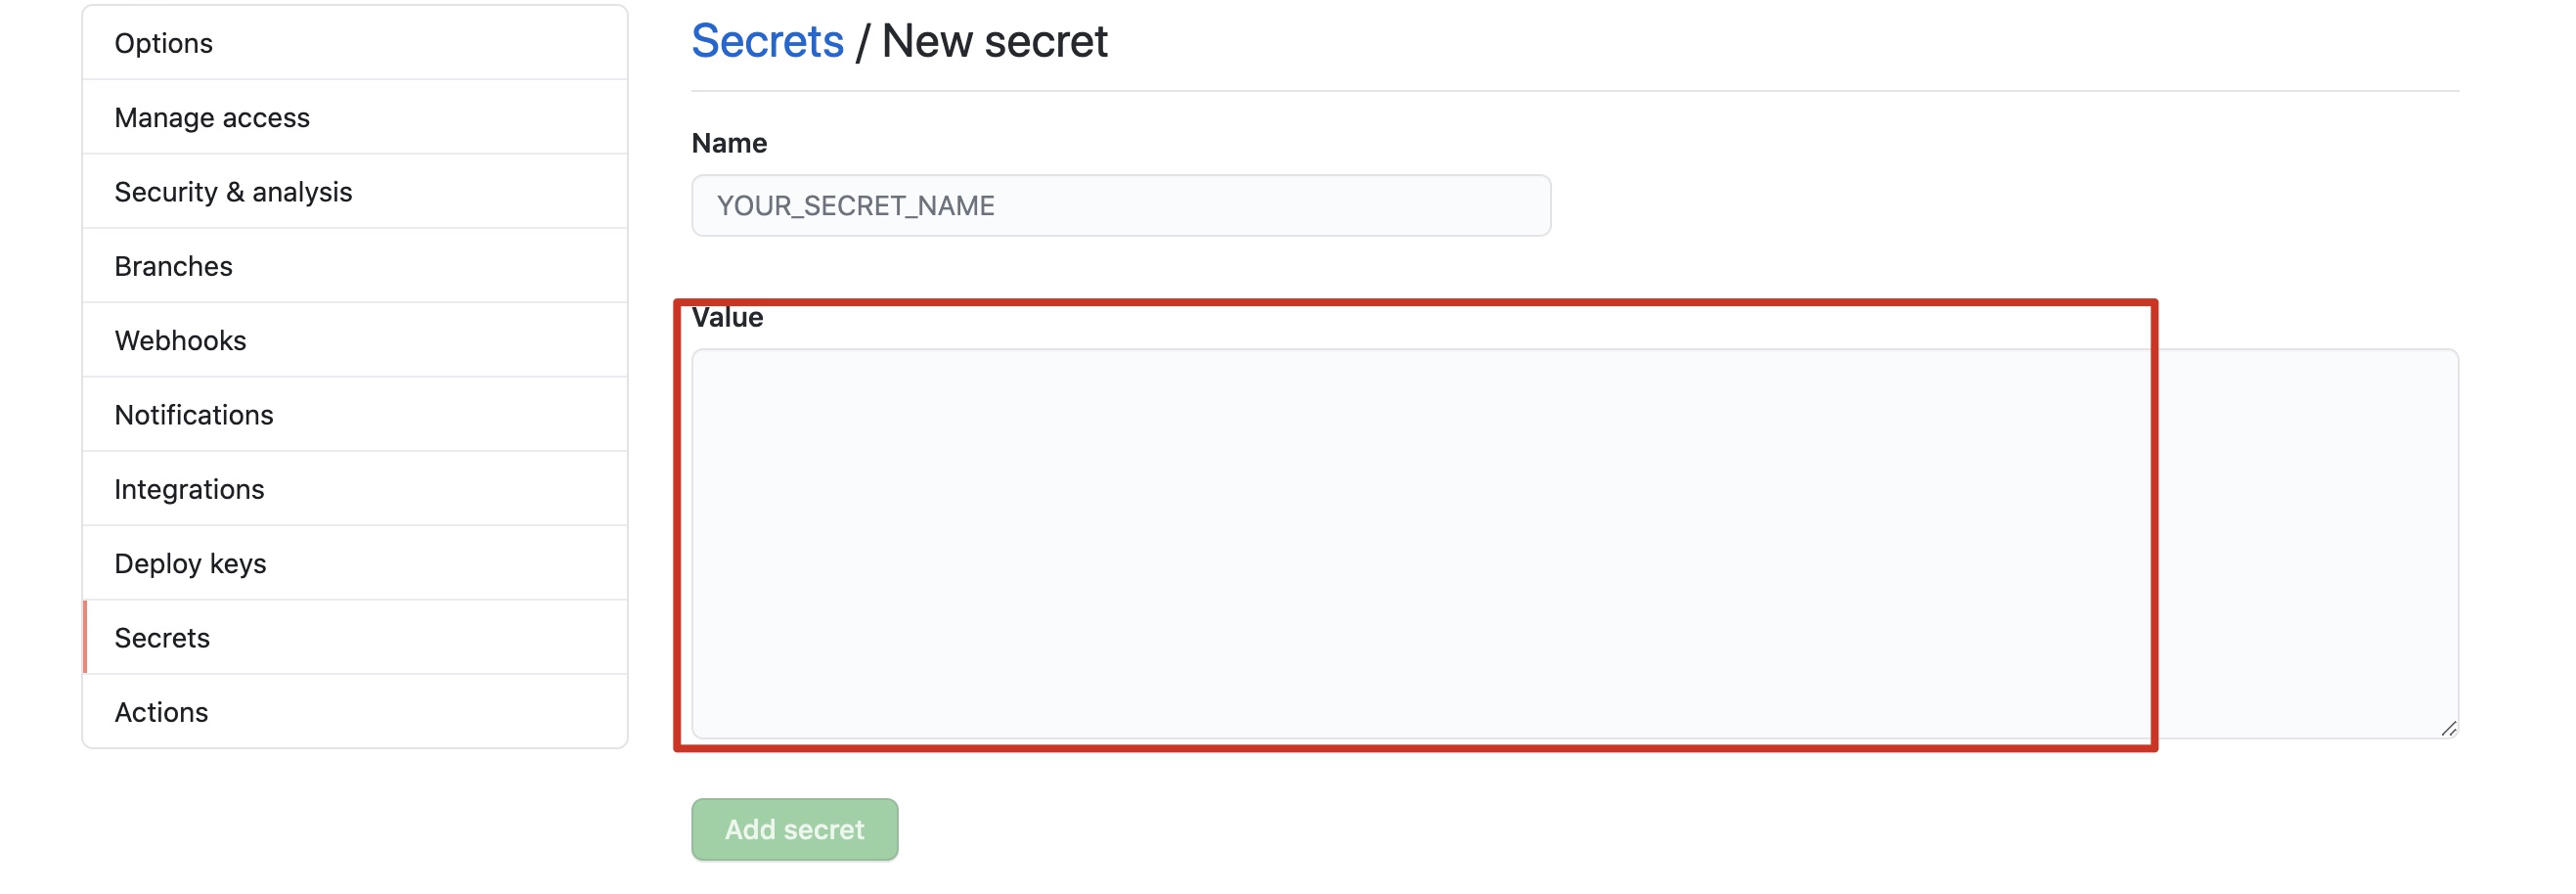
在GitHub中博客工程中按照 Settings->Secrets->Add a new secrets 找到对应的页面,然后进行私钥添加。该页面中 Name 自定义即可,Value中添加 github-deploy-key 文件中的内容或者你本地id_rsa中的内容。

hexo 配置
在项目根目录中修改 _config.yml ,增加部署相关内容:
1
2
3
4
| deploy:
type: git
repo: git仓库地址
branch: master
|
创建持续集成脚本
1
2
3
4
5
6
7
8
9
10
11
12
13
14
15
16
17
18
19
20
21
22
23
24
25
26
27
28
29
30
31
32
33
34
35
36
37
38
39
40
41
42
43
44
| name: hexo deploy
on:
push:
branches:
- master
jobs:
build:
runs-on: ubuntu-16.04
steps:
- name: Checkout source
uses: actions/checkout@v1
with:
submodules: true
- name: Use Node.js
uses: actions/setup-node@v1
with:
version: "10.x"
- name: Setup ssh
env:
ACTION_DEPLOY_KEY: ${{ secrets.HEXO_DEPLOY_PRI }}
run: |
mkdir -p ~/.ssh/
echo "$ACTION_DEPLOY_KEY" > ~/.ssh/id_rsa
chmod 600 ~/.ssh/id_rsa
ssh-keyscan github.com >> ~/.ssh/known_hosts
git config --global user.email "[email protected]"
git config --global user.name "lujiahao0708"
- name: Setup hexo
if: steps.cache.outputs.cache-hit != 'true'
run: |
npm install hexo-cli -g
npm install
- name: Hexo deploy
run: |
hexo clean
hexo d
|
通过上面的配置,基本上你就可自动部署hexo,同时上面的脚本还可以更简单一点,使用github actions marketplace 中现有的脚本,如下
1
2
3
4
5
6
7
8
9
10
11
12
13
14
15
16
17
18
19
20
21
22
23
24
25
26
27
28
29
30
31
32
33
34
35
36
37
38
39
40
|
name: Deploy Blog
on:
push:
branches:
- master
jobs:
build:
runs-on: ubuntu-16.04
if: github.event.repository.owner.id == github.event.sender.id
steps:
- name: Checkout
uses: actions/checkout@v1
with:
submodules: true
- name: Use Node.js 10.x
uses: actions/setup-node@v1
id: cache
with:
node-version: "10.x"
- name: Install Dependencies
if: steps.cache.outputs.cache-hit != 'true'
run: |
npm i -g hexo-cli # 安装hexo
npm i
- name: Deploy
id: deploy
uses: sma11black/[email protected]
with:
deploy_key: ${{ secrets.ACTION_DEPLOY_KEY }}
user_name: fengxiu
user_email: [email protected]
commit_msg: ${{ github.event.head_commit.message }}
|
验证
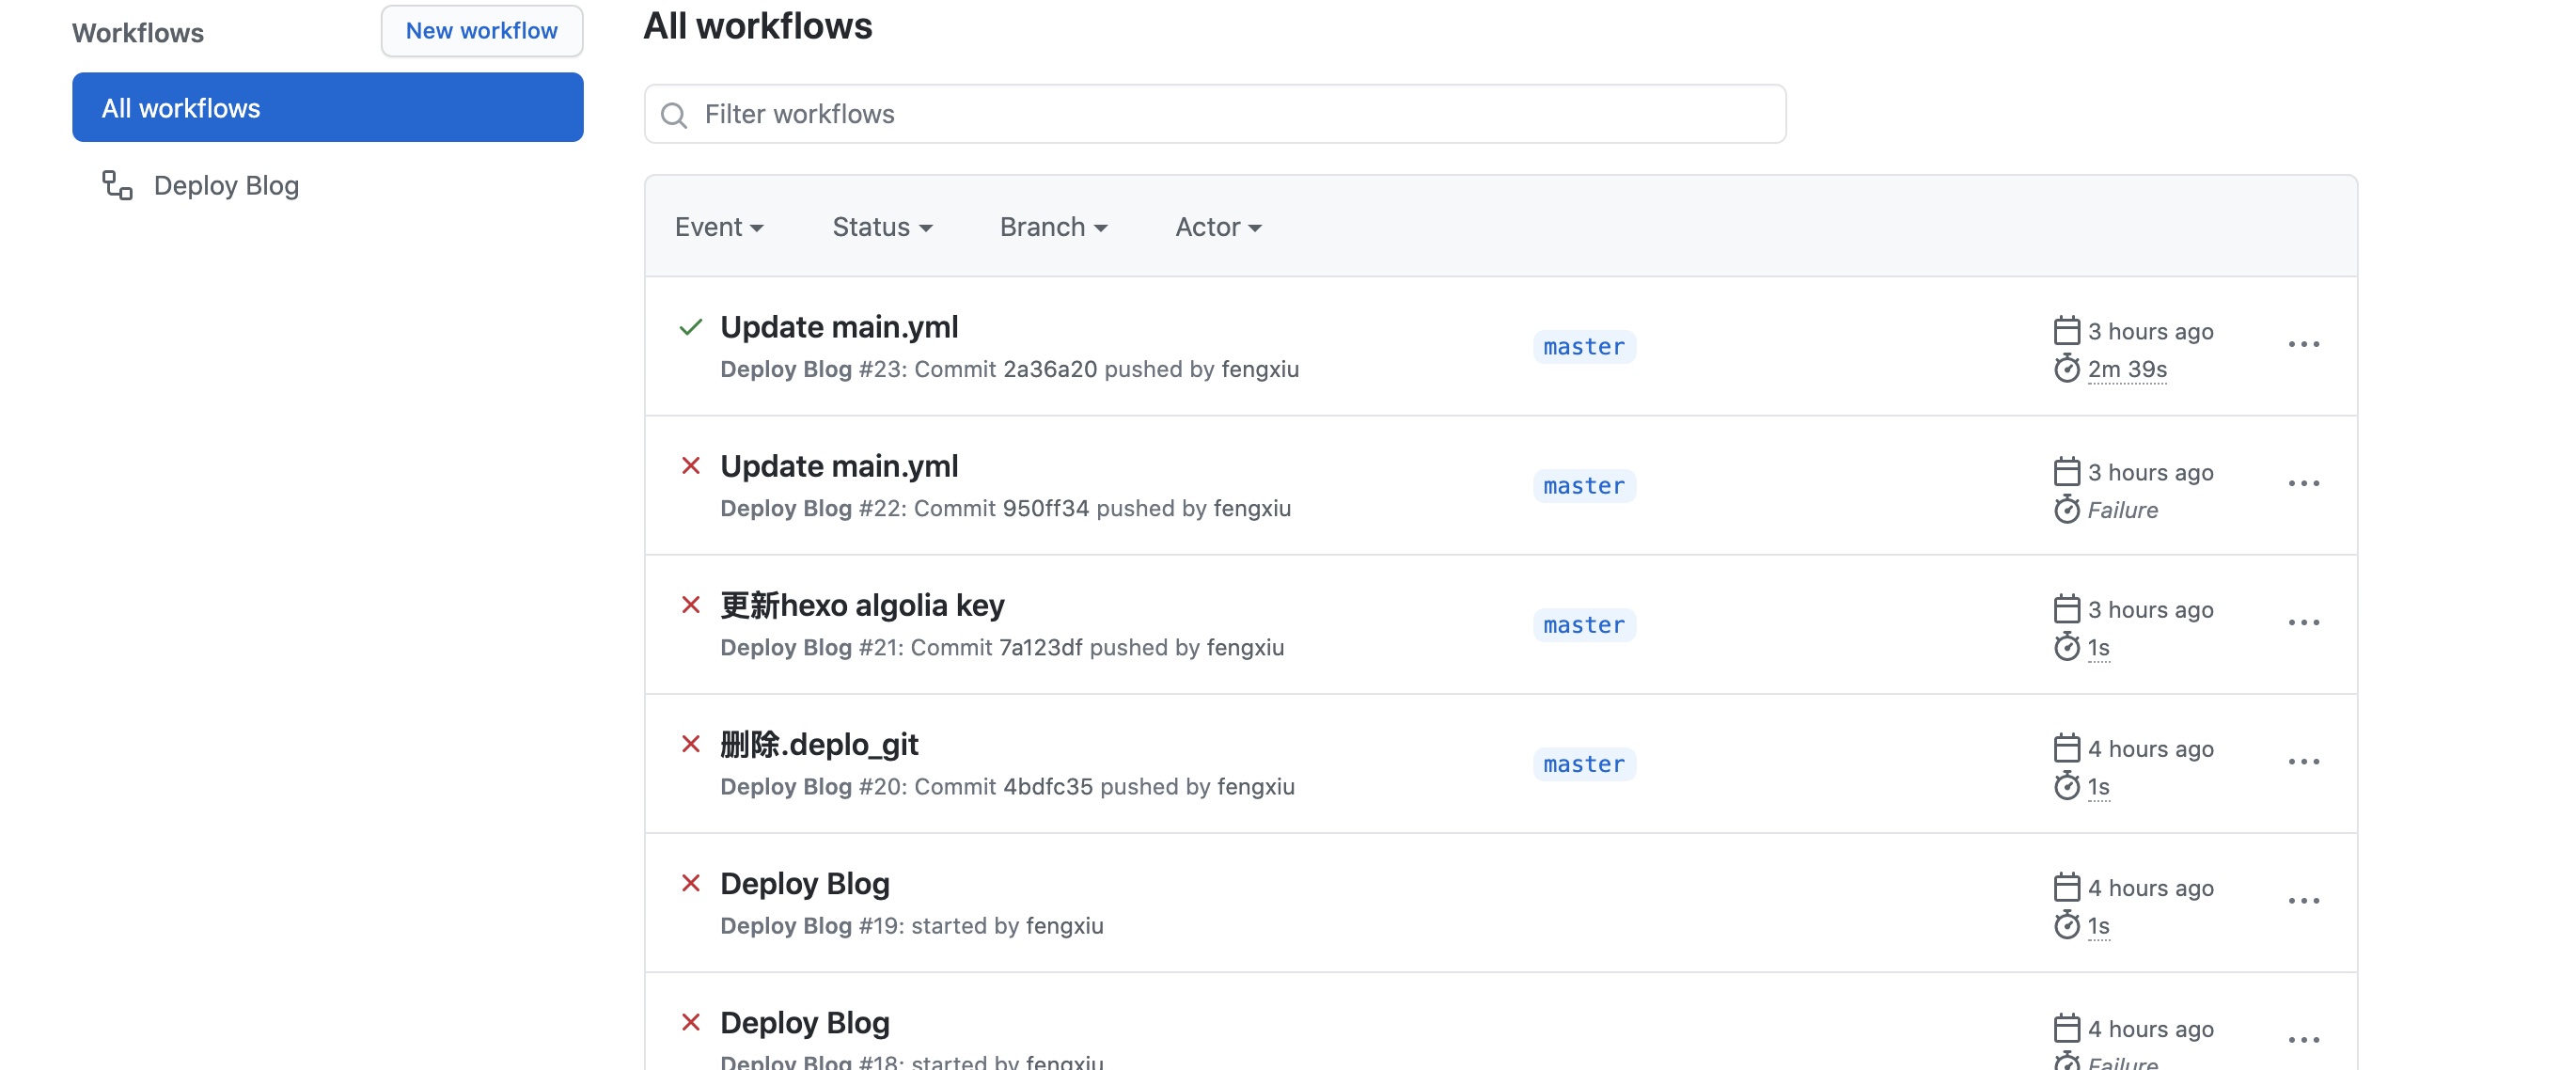
通过上面配置,已经完成自动部署hexo的功能,可以在Actions选项中看

如果配置过程中出现问题,可以点击其中错误的build过程,就可以找出具体的问题。


